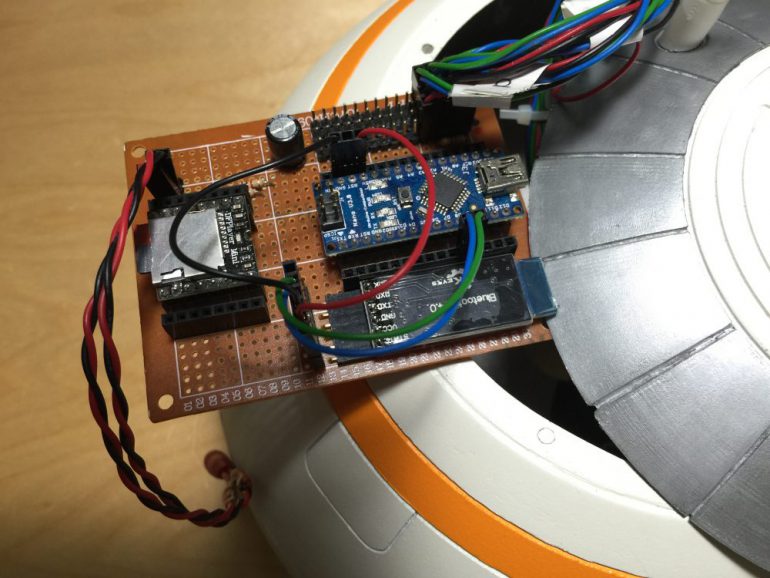
Building BB-8: Part 5 – Dome Assembly Electronics (Schematic)
The connection are as follows:
DF Mini (MP3) Player
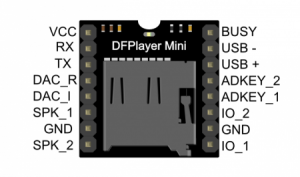
DF Mini Player > Arduino Nano & Speaker
- VCC > 5V Pin
- RX > PIN 5 as TX (Place a 220 ohms resistor in between, using SoftwareSerial)
- TX > PIN 4 RX (Place a 220 ohms resistor in between, using SoftwareSerial)
- SPK_1 > Speaker – (Negative)
- GND > GND Pin
- SPK_2 > Speaker + (Positive) and Pin A5 on the Arduino
- BUSY > A5 Pin
RGB LED
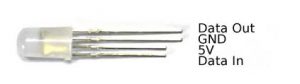
RGB LED > Arduino Nano
- Data Out > Pin 6 (Place a 470 ohms resistor in between)
- GND > GND Pin (Connect to a 1000 uF capacitor -)
- 5V > 5V Pin (Connect to the same 1000 uF capacitor +)
- Data In > Previous RGB LED Data Out (If this is not the first LED)
HM-10 Bluetooth Module
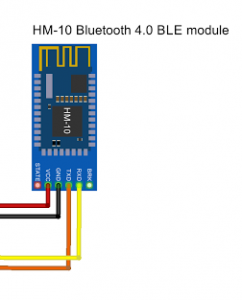
HM-10 > Arduino Nano
- VCC > 5V Pin
- GND > GND Pin
- RX > PIN 9 as TX (Using AltSoftSerial)
- TX > PIN 8 RX (Using AltSoftSerial)
For more robotics, 3D printing and amazing Arduino projects, check out IXEN Robotics Singapore website.